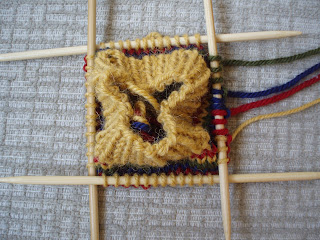
For this tutorial, you will need:
*Four balls of yarn of the same weight in different colors
*5 dpns (or a long circular needle for magic loop) in the corresponding size

To start with, cast on the desired number of stitches in your main color (MC). I cast on 48 stitches, which is a nice multiple of 4 colors and 3 'buffer' stitches (explained later).
Work a short cuff; this gives a little smoother transition into the striped section. I knit a *K1,P1* rib for about an inch.

Now you will begin to set up your striped section. Knit the first 25% of the stitches in MC--in my case this fraction is 12 st. Pick up contrast color 3 (CC3) and knit the next 25% of the stitches in CC3. Knit the subsequent 25% in CC2 and the last 25% in CC1. Your needles should look something like this:

Rotate the work until you find the tail of CC2. You are now going to layer CC2 above the stitches you just made with CC1. Using CC2, knit into all but the last 3 stitches in CC1. These are the 'buffer' stitches for CC1 which will keep the stripes from jogging. In my case, I simply knit my next 9 stitches in blue from where I dropped the tail, as if no other strange things were going on.

Find the tail of CC3. Knit into all of the CC2 stitches, leaving the last 3 as buffer stitches. You should now have 3 buffer stitches in CC1 and another 3 in CC2. In my case, I picked up my red tail and knit 18 stitches, slipping the next 6 buffer stitches to give:

Finally, grab the tail of MC and knit into all of the stitches of CC3, save 3. This will leave you with 3 buffer stitches in each color, with the remainder of the stitches in MC. In my case, I knit 27 stitches in yellow and slipped the next 9 buffer stitches out of the way.

If you look carefully, you can start to see the stripes accumulating.

Now you are ready to work your stripes. Starting with CC1, knit over all of the MC stitches except for the last three. You should have 3 stitches each in CC2, CC3 and MC, with the rest being CC1. For me, I knit 36 stitches in CC1, slipping the 9 buffer stitches out of the way.

Repeat this process for CC2, CC3, and MC, in that order. You may notice that after knitting these 4 rows, you have not made a complete circuit around the needles. By not working the entire round and leaving a few 'live' stitches in each color, you essentially prevent the your stripes from jogging. All of my buffer stitches have ended up one needle to the right of where they started 4 rows ago.

Laying your work flat, the stripes really start to appear.

Work the last four rows as many times as you desire, layering each stripe on top of the previous until you work is at the desired length.

To end the striped section, you will work the set-up in reverse. Knit CC1 as during the striped section. Pick up the tail of CC2 and knit into CC1. However, this time you will leave 25% of the total stitches (12 stitches in my case) as CC1 buffer stitches instead of the normal 3. Pick up CC3 and knit, leaving 25% of the stitches as buffer CC2. Repeat this for MC. This will leave you with a quarter of your stitches in each color, as in the beginning.

Work one complete round in MC, knitting over the buffer stitches of all the contrast colors, thus ending the striped section. Cut the tails of the contrast colors. Work another cuff at the end, if desired. I did another inch of *K1,P1* rib to mirror the beginning.

Cast off. Before you weave in the ends, pull the tails (both the beginning and ending) of the contrast colors snug, as this will give a smoother transition into the striped section. Finish as usual.
Questions or comments? Contact me at brineydeepdesigns_at_gmail_dot_com!

4 comments:
I think you must have put this tutorial up just for me to find. Wonderful! With pic's and everything! Thank you!
romettekitty@hotmail.com
Your blog keeps getting better and better! Your older articles are not as good as newer ones you have a lot more creativity and originality now keep it up!
Thank you so much!
You explain well and the photos are great.
I am totally jazzed about this tutorial and technique. Thank you so much.
Post a Comment