I drink a lot of tea. So much so that I might be considered, well, a tea snob. Some people drink wine, others coffee, but I am ever in search of that perfect cup of tea. While on this quest, I've collected a number of teacups, teapots, and tea tins along the way. It's pretty obvious what to do with the first two items, but what do you do with those extra tea tins once you've drunk all that tea?
So, I'm taking a little break from the knitting today to share with you some creative uses for extra tins or decorative boxes you happen to have around.
Pens & Pencils
A reasonably sized tea controls the usual chaos that surrounds these writing utensils. Plus, I get to look at that pretty Chinese mountain scene when I am having a bad day at work!
Paperclips, Rubberbands, & Pushpins
I like to use my short and squat tins for my other office supplies. This enables me to easily find the item I am looking for without having to dig through a pile of pushpins. Eek! And this tin has apparently become the haven for loose change, which is another great use for a spare tin.
Scissors, Knitting Needles, & Other Craft Supplies
This tall Octavia tin lives on my craft desk, providing a place where I can always find my scissors on short notice. I also keep my sparkly craft pens, my favorite flower pen, and a few other items in here. And if I didn't have a few knitting needle cases already, I'm sure that my needles would find a home in one of these old tins.
Tea 'Service'
This is my favorite use for an old tea tin, as it houses all of the notions I need to make my morning pot of tea. From the tea towel I use to wipe off my just-rinsed pot, to the three minute timer, to my favorite notion of all--a tea spoon that helps measure '1 cup of perfect tea'--I use this almost every day.
Or More Tea!
When in doubt, I fill those old tins with more tea, because I always seem to have plenty extra around!
Sunday, December 28, 2008
Monday, December 22, 2008
Holiday Knitting
Did you know that the car is the ideal place to wind skeins into balls of yarn? I discovered this truth on the nine hour car ride to my parent's house yesterday, when it was DH's turn at the wheel. Sitting on the passenger's side, I simply draped the skein around my knees and wound a few balls. Now I am all ready to enjoy a very knit-filled holiday vacation.
I've got big plans for a scarf for DH and a pair of socks for me, but I also hope to do something with the yarn pictured above, which I won at the Ravelry get-together after Wisconsin Sheep and Wool. It is 560 yards of worsted weight yarn from the local dyer Happy Hands. I was thinking about making knee-high socks with it, as that would be obnoxious enough to offset the vibrant colors, but am unsure what to do for a pattern. Each of the 8 color sections is 2 inches long and they repeat in a set order, so my biggest challenge will be pooling. Maybe a slip-stitch pattern? If you have any suggestions, I would love to hear them!
In the meantime, I hope you all have a wonderful holiday season and get lots of knitting done!
Sunday, December 14, 2008
Andy's Sweater: The Full Story
Words are failing me today. How do I express the time, emotion, and work that I have put into this sweater? I've dropped hints and clues in some of my previous posts, but perhaps it's time to tell the whole story.
From almost the moment that Andy discovered I could knit, he's been harassing me for a sweater. The first time he asked as a friend, and as a friend I answered a resounding 'No'. However, I did knit him a scarf, which eventually prompted him to ask me out on a date. We then dated for several years, and, as much as I explained the boyfriend-sweater curse to him, I still had several more requests for a sweater. Finally, in the fall of last year, we got married. As a wedding gift, I gave him a box of yarn with the promise of finally making him a sweater.
After returning from our Italian honeymoon, I set to work planning the sweater. I was going to knit Elizabeth Zimmerman's Classic Brooks Sweater and I was going to knit it in under a month as part of NaKniSweMo. In this I was somewhat successful; I finished the sweater while on Thanksgiving vacation with Andy's family, but as soon as he tried on the sweater, I knew it was all wrong. The body was too tight, the arms too large, and the saddle shoulder style did not flatter him at all. In my heart, I knew that the only way to fix it (and for me to be happy) was to rip it all out and start again with a different pattern and better measurements.
So the sweater sat abandoned for several months until I was emotionally stable enough to rip the entire thing out and start anew. This time, I was going to knit the top-down Classic Raglan Pullover by Barbara Walker. The top-down method makes it much easier for on-the-fly adjustments to ensure proper fit--meaning I only had to rip out half of a sleeve when I discovered that the arms were too large, instead of frogging two whole sleeves. This sweater took a little longer and a little more yarn to complete than the previous, and aside from the slightly darker color of the right-front forearm (the extra yarn was a different dyelot), I was pretty happy with it. I blocked it just in time to give to Andy as a first anniversary present. But the sweater had other plans.
Despite a second blocking attempt, the sweater was obviously too long. When Andy stated, "It's fine. It will be a great around-the-house sweater," I knew that I would not be happy until it fit properly and he didn't feel embarrassed to wear it out in public. At this point, I was really glad that I chose a top-down design, as it is so easy to modify the length. I simply ripped out 5 inches from the hem and reknit 2. And with the extra yarn, I reknit the right sleeve to match the rest of the sweater. Then I blocked the sweater a third time and crossed my fingers.
So, finally, over a year after starting this sweater and having knit countless more stitches than are actually represented in the final product, I am proud to present Andy's sweater:
Disclaimer: Knitting a sweater for your SO can be hazardous to your health. Please do not undertake the above without consulting with your SO about the strength of your relationship. Luckily, I love this man and he appreciates my determination to knit a sweater that both fits and flatters him.
Saturday, December 06, 2008
Book List
This week has been totally unproductive in the knitting department. Maybe it was that frustrating project at work or putting together Christmas gifts, but all I managed to do was finish casting off on DH's sweater. You know, the sweater I have knit twice in full, and it still isn't right. Yeah, that one. I worked on it over Thanksgiving and hopefully I will have an actual finished sweater to post about next week. That is, if the books don't eat me first.
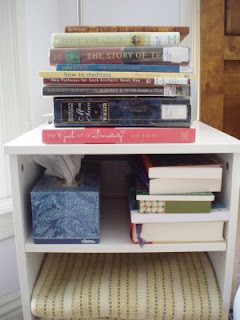
So perhaps this is the real reason I didn't do any knitting in the last seven days. Somehow my modest to-read pile ballooned to 15 books this week. While a significant number of books in the pile are on tea, you may espy Color Style, Knitter's Almanac, New Pathways for Sock Knitters, The Gentle Art of Domesticity, and a non-knitting book by Barbara Walker hidden in the stack. Even when I'm not physically knitting, I guess I don't get that far away.
(And if I had to pick only one of these knitting books, it would be the sock pathways book. Cat Bordhi is a genius!)
Sunday, November 30, 2008
Ron Socks
Okay, maybe I should just admit this upfront: I am a big Harry Potter fan. I love everything from the books to the movies to the merchandise. You could take a piece of crap, slap a Harry Potter logo on it, and I would want to buy it. Harry Potter coffee mug? Sure! Harry Potter clock? Okay! Harry Potter sock yarn? Yes please!
Luckily, my lack of endless financial resources is balanced out by the fact that I'm slightly disappointed in the sock yarn's offered colorways. The only one that even resembles its character is 'Ron', and don't even get me started on the fact that there is no 'Hermoine' colorway. So I was able to execute a little self control before I broke down and finally bought the Ron colorway.
Despite the fact that these colors scream "RON!" to me, I'm still not mad about this yarn. The finished socks needed a little extra something to make them special or else they would just be mildly ugly. So, taking a page out of Mrs. Weasley's knitting book, I decided to embroider little R's on the cuffs.
The resulting socks are not mildly ugly, they're just pretty dorky. And I'm okay with that. It is one more pair of wool socks to get me through the Wisconsin Winter, and one more reminder that I have to wait an extra 8 months for the next Harry Potter movie. I hate you Warner Brothers...
Saturday, November 22, 2008
Craftacular
I started thinking about the c-word this week. I'm usually a strict no-c*******s-before-thanksgiving kind of person, but, as I usually make some of my gifts, I need to plan ahead. Considering I was knitting socks for my parents in September last year, I think that I am doing pretty well this time around.
Anyway, it was craft week over at casa Briney Deep. I won't be knitting a lot of gifts this year, so I was testing out a couple other crafty ideas I found around the net.
The first idea that I am madly in love with is homemade notepads. I swear that everyone I know is going to get one of these in their stocking this year. It was a small investment to buy the padding compound, but I'll get a least a hundred of these super cute pads out of it. I've got a bunch of great ideas for these little guys.
And for the lucky few who are getting knitted gifts, these fabric labels will let them know they were hand knit by me. A simple combination of twill tape and printable, iron-on transfers, these labels were much less expensive than other custom labels I have seen. And I'm really happy with the look that my pinking sheers gave the edges.
Next week, it's back to knitting!
Sunday, November 16, 2008
Back to Beading
Beading was my thing as a kid. I remember taking summer school art classes in beading and eventually making at least a hundred different necklaces before my enthusiasm for this craft dwindled. So I was pleasantly surprise when my DH got me some beads for my birthday. (I actually ruined his original idea by buying a set of martini glasses two weeks before my special day. Oops!)
The beads were dark green, shaped like little tildes, and there were just enough of them to make a necklace. So after a little trip to JoAnn's and a dig through my craft closet, I came up with all of the supplies necessary to make this:
Making this necklace reminded me of how much I loved this hobby and how many beads I still have, squirreled away in the closet. Perhaps one day, after I am out of grad school, I will get back to beading.
Sunday, November 09, 2008
Mithril Shawl, Finished
If I missed some of the subtlety of my Mithril shawl in the first post about it, this picture should show it a little better.
I just love how this shawl turned out. It worked up surprisingly quickly and the pattern shows very well after a quick overnight blocking.
The only issue I had with this shawl was that it turned out much too long after blocking. I had originally used about 1.5 skeins of KnitPicks Shimmer, but frogging the extra half a skein resulted in a much better length. Now I have a whole extra skein to make a second shawl!
Tuesday, October 28, 2008
Free Pattern: Bike Helmet Earmuffs
People bike year-round in Madison, Wisconsin. And while I refuse to bike in any sort of snow, it is very likely that I will meet with cold weather as I bike to work in October and November. My husband was the first to state that his ears were getting cold while biking, giving me the look that clearly said, “I’m sure that you can fix this by knitting me something.” So I set to work making him a liner for his bike helmet; something that would cover his ears, integrate into the straps, and, most importantly, stay in place. After a couple hours of knitting, I’m delighted to share the result with you!
And if you are interested in knitting your own ear-warmer, I've written up some pithy instructions below:
BIKE HELMET EARMUFFS
Gauge: 20 st/28 rows = 4 inches in stockinette
Needles: Set of 5 US#7/4.5mm dpns
Materials: 1 ball Knitpicks Swish Worsted [Superwash Merino Wool, 110 yds per 50 grm ball] in Dark Navy
Pattern:
Cast on 12 st. Join to work in the round, being careful not to twist.
*K1, P1* for a total of 4 rounds.
Divide stitches evenly onto 4 needles.
Round 1: *K1, M1, K to end of needle. K to last stitch on second needle, M1, K1.* Repeat ** for needles 3 and 4.
Round 2 & 3: K even.
Repeat these three rounds seven more times until you have 44 stitches, ending with round 3.
Work 4 rounds in *K1, P1* ribbing.
Cast off 22 st.
Continue to work *K1, P1* rib back and forth with the other half of stitches for 10.5 inches, or whatever fits your helmet/head.
Cast on 22 st on the same side of your knitting as you cast of the previous stitches. Divide stitches evenly over 4 needles. Join to work in the round, being careful not to twist.
Work 4 rounds in *K1,P1* ribbing.
Round 5 & 6: K even.
Round 7: *SSK, K to end of needle. K to second to last stitch on second needle, K2tog.* Repeat ** for needles 3 and 4.
Repeat these three rounds seven more times until there are 12 stitches.
*K1, P1* for 4 rounds.
Cast off. Weave in ends.
Questions or errata? Contact me at brineydeepdesigns_at_gmail_dot_com!
This work is licensed under a Creative Commons Attribution-ShareAlike 3.0 Unported License.
Saturday, October 25, 2008
Mithril Shawl
If I embarrassed myself in my last post due to the long delay between finishing and photographing/blogging about my February Lady Sweater, I'm going to try to make up for it here. Today I'm posting about an actual work in progress!
The pattern is the Crocus Bud Shawl and I am making it with the dreamy alpaca-silk blend, Knit Picks Shimmer in the Cumulus colorway. The yarn is hand-painted in a subtle mix of grays--some lighter, some darker, a tint of brown here, a touch of icy blue there. I just love the resulting combination of the beautifully simple crochet pattern with this gorgeous yarn! I can't help but think of Mithril, of which Tolkien saud:
Light and delicate, beautiful and subtle, all made into a clothe of many loops and chains. Thus the Mithril shawl.
(And don't you just love the corner of my arm the photo, as I attempted to stretch out the lace to show the pattern?)
The pattern is the Crocus Bud Shawl and I am making it with the dreamy alpaca-silk blend, Knit Picks Shimmer in the Cumulus colorway. The yarn is hand-painted in a subtle mix of grays--some lighter, some darker, a tint of brown here, a touch of icy blue there. I just love the resulting combination of the beautifully simple crochet pattern with this gorgeous yarn! I can't help but think of Mithril, of which Tolkien saud:
"[The shirt] was close-woven of many rings, as supple almost as linen, cold as ice, and harder than steel. It shone like moonlit silver."
Light and delicate, beautiful and subtle, all made into a clothe of many loops and chains. Thus the Mithril shawl.
(And don't you just love the corner of my arm the photo, as I attempted to stretch out the lace to show the pattern?)
Sunday, October 19, 2008
Fall Photo-Op
Yesterday was such a beautiful, sunny day, that I dragged my DH outside to take pictures of a few finished objects. First up, my February Lady Sweater (which is the adult version of EZ's famous February Baby Sweater):
I'm a little embarrassed to say that this sweater has been finished since July and has been waiting 3 months for me to take photos! My version is made out of Knit Picks Alpaca Silk in Olive, which I thoroughly enjoyed knitting with. Between the pattern, yarn, and color, I'm going to give this sweater two thumbs up!
Next up are the Pembrokeshire Pathways socks. These are knit out of Kraemer Yarns' Jeannie, which is a thinner, undyed sock yarn that I simply love. Knit up on size 1 needles, these socks are so comfortable! However, the experience of knitting these, as well as my Snicket socks, has made me swear off knitting cabled socks for a long time. DPNs and cable needles just do not mix.
Conspicuously absent from the photo shoot is DH's raglan sweater. I have blocked it twice now, and it has still come out too long! I might be forced to rip out some of the body and reknit the hem. This is the project that will simply never end! Arg!
Monday, October 13, 2008
Free Pattern: Walking Stripes
This pattern is also available as a free pdf download on Ravelry
These may appear to be simple striped mitts, but they have a secret. Turn them round and round and you will never find a seam or a jog. Instead, the stripes ‘walk’ continuously from the wrist to the knuckles, all the way up the mitt.
The key to achieving this effect is to layer the colors a little bit at a time. Each color is worked for only 75% of the total stitches, with the next color worked directly overtop it. Retaining a few live stitches in each of the four colors prevents the stripe pattern from being interrupted.
Besides learning a new technique, these mitts offer a great opportunity to play with color. Choose three yarns of a similar hue and add a contrast, as for the mitts shown here, or use the same color twice to produce two stripes on a neutral background. Alternatively, create subtle fraternal mitts by changing the order of the stripes.
So grab a few spare skeins of yarn and make a pair for yourself or a friend. You’ll find that these stripes work up quickly (despite the fact that they don’t jog)!
Finished Measurements
Width: 4 inches
Length: 8 inches
Gauge
24 sts/34 rows = 4" in stockinette stitch
Materials
Knit Picks Telemark [100% wool; 103 yd/94 m per 50g ball]; 1 ball each
[MC] Pesto
[CC1] Northern Green
[CC2] Aubergine
[CC3] Lichen
Set of 5 US #3/3.25 mm double-point needles
Stitch markers
Scrap yarn
Tapestry needle
Difficulty
This pattern is suitable for an advanced beginner who is comfortable working with double-points.
Pattern Notes
The needles in this pattern are numbered in a clockwise direction, with the very first stitch being on needle 1. Though rounds may begin on different needles, the numbering will remain fixed relative to the very first stitch.
PATTERN
CO 48 st in MC. Divide evenly over 4 needles. Join, being careful not to twist.
Bottom Cuff
*K1, P1* for a total of 10 rounds.
Set up striped section
With MC, k12 on needle 1.
Join CC3, k12 on needle 2.
Join CC2, k12 on needle 3.
Join CC1, k12 on needle 4.
At this point, there will be 12 stitches in each color on the four needles.
Turn work and pick up CC2. K9 on needle 4, sl3.
Turn work and pick up CC3. K18 on needles 3 and 4, sl6.
Turn work and pick up MC. K27 on needles 2, 3, and 4, sl9.
You should now have 3 stitches in each color on needle 4; the other needles are all MC. Note that you will return to this ‘home’ configuration after ever 4 rows but ending on a different needle, as you will only work 3/4 of the total stitches for every 4 written rows.
Main section
Row 1: with CC1, K36, sl9.
Row 2: with CC2, K36, sl9.
Row 3: with CC3, K36, sl9.
Row 4: with MC, K36, sl9.
Repeat rows 1-4 six more times, ending with 3 stitches in each color on needle 1.
Row 29: with CC1, k35, place marker, m1, k1, sl1, place marker, sl8.
Row 30: with CC2, k37, sl9.
Row 31: with CC3, k37, sl9.
Row 32: with MC, k37, sl9.
Row 33: with CC1, k1, m1, sl marker, k35, sl10.
Row 34: with CC2, k37, sl10.
Row 35: with CC3, k4, sl marker, m1, k4, m1, sl marker, k29, sl10.
Row 36: with MC, k39, sl 9.
Row 37: with CC1, k11, sl marker, m1, k6, m1, sl marker, k23, sl9.
Row 38: with CC2, k42, sl9.
Row 39: with CC3, k17, sl marker, m1, k8, m1, sl marker, k17, sl9.
Row 40: with MC, k44, sl9.
Row 41: with CC1, k23, sl marker, m1, k10, m1, sl marker, k11, sl9.
Row 42: with CC2, k46, sl9.
Row 43: with CC3, k29, sl marker, m1, k12, m1, sl marker, k5, sl9.
Row 44: with MC, k48, sl9.
Row 45: with CC1, k35, sl marker, m1, k7, sl15.
Row 46: with CC2, k43, sl15.
Row 47: with CC3, k41, sl marker, m1, k2, sl15.
Row 48: with MC, k44, sl9.
Row 49: with CC1, k7, m1, sl marker, k35, sl17.
Row 50: with CC2, k43, sl17.
Row 51: with CC3, k14, m1, sl marker, k29, sl17.
Row 52: with MC, k44, sl9.
There are now 18 stitches in between the markers. Place the center 16 st on a piece of scrap yarn and remove the markers. These reserved stitches will make the thumb (below). The remaining 48 stitches should be back in the ‘home’ configuration, with 3 stitches in each color on needle 3.
Repeat rows 1-4 three more times, ending with 3 stitches in each color on needle 4.
End striped section
With CC1, k36, sl9.
With CC2, k27, ending on needle 2.
On needle 4 with CC3, sl6, k18 on needles 4 and 1.
On needle 4 with MC, sl3, k9 on needle 4.
There will be 12 stitches in each color on the four needles, as in the beginning.
Cut CC1, CC2, and CC3.
In MC, knit one round.
Top Cuff
*K1, P1* for total of 7 rounds.
Bind off loosely.
Thumb
Pick up 16 stitches on scrap yarn, dividing over 3 needles.
With MC, pick up and knit 2 stitches at the back of the thumb hole.
*K1, P1* for a total of 6 rounds.
Bind off loosely.
Finishing
Pull contrast color ends snug. Weave in all ends.
This pattern is intended for personal use only.
Questions or errata? Contact me at brineydeepdesigns_at_gmail_dot_com!
Sunday, September 28, 2008
Shouting from the Rooftops
I feel like the running joke throughout my blog for the past several months has been how I need to finish the darling husband's sweater. You know, the one I promised him as a wedding gift, knit once, hated and frogged, and has since been languishing in the corner pleading to be worked on. Yeah, that one.
Well, I am proud to say that it is finished. And it is awesome!
I still need to weave all of the ends in, as well as block it, so full pictures and description are forthcoming. In the meantime, I just had to share my success!
Well, I am proud to say that it is finished. And it is awesome!
I still need to weave all of the ends in, as well as block it, so full pictures and description are forthcoming. In the meantime, I just had to share my success!
Sunday, September 14, 2008
A New Toy
As if knitting, spinning, and crocheting aren't enough, I have taken up a new hobby; weaving. My mother is the weaver in the family, with enough looms, yarn, and other equipment to fill up an entire room. But I'm getting started on a little smaller of a scale:
This is the little Arbor loom my Mom got me for my birthday this year. Due to its size and simplicity, it only does one thing well: it makes 4x4" squares. So far I've made a small handtowel and bag, but with a little imagination, you can do a lot with 4" squares.
And another reason I like this little loom, is that I can create fabric quickly. It takes just under 30 minutes to make a square, and in the 2 weeks since receiving this loom, I've made about 20 squares.
I don't think that it will replace knitting, but it's fun to have a new toy in the meantime!
Sunday, September 07, 2008
Wisconsin Sheep & Wool
I went to my very first sheep & wool festival this weekend, over in Jefferson, WI. My mother put me on to this festival last year, but I did not have anyone to go with. This year, however, I teamed up with my friend Mary Beth, who works in my department. This is her below, deciding what her roommate would say if she brought home a sheep.
It was a fun day for the both of us. We walked around the 2 vendor barns, pet an angora rabbit, helped corral some sheep (seriously), drank root beer floats, and watched a trainer teach a dog/owner to herd sheep. Besides the ice cream, I purchased some gorgeous white alpaca roving to spin and some lovely Olive green sock yarn from Knitting Notions. Mary Beth successfully kept me from purchasing a darning egg and a set of Signature needles. Yet another reason to go with a friend to the sheep & wool festival.
After the festival had ended for the day, we met up with some fellow knitters from Ravelry. It was nice to put some faces with user names and even the knitters I have never met felt like old friends. And I won a skein of hand-dyed yarn as a door prize!
So, it was a very successful day and I'm looking forward to doing it again next year. In the meantime, I have plenty of yarn to play with at home (or so my husband keeps reminding me).
Tuesday, August 26, 2008
Coachella
Is it sad that since my last post over 2 months ago, I have only finished 1 of the 3 projects I blogged about? Let's just say that the white period was very short-lived.
Nothing against those projects, but what I should really be making right now is something light and summery. Cotton meets tank top meets tropical vacation. And Coachella fit the bill exactly.
It didn't hurt that my mother took me to a new yarn shop, A Tangled Tale, and graciously offered to buy me a few skeins of this gorgeous cotton called 2nd Time Cotton. Not only is this stuff beautiful, it's also recycled from industrial waste. I'm a grown woman, but I'm not going to turn down an offer of free yarn from Mom!
And as further proof that the stars aligned for this project, I finished it while on vacation. In Cancun. Just in time to wear it and take the awesome beach photos seen here. I especially like the next photo which shows the neat design for the back of the top, in addition to my super awesome sunburn. Yay for being pale.
This was my first time working with cotton, and I would have to say that it turned out well. I still think that I prefer wool, but it was the right yarn for this project. It just means that I can't wear this top much longer, give the impending Wisconsin weather. Maybe it's time I get back to knitting socks...
Nothing against those projects, but what I should really be making right now is something light and summery. Cotton meets tank top meets tropical vacation. And Coachella fit the bill exactly.
It didn't hurt that my mother took me to a new yarn shop, A Tangled Tale, and graciously offered to buy me a few skeins of this gorgeous cotton called 2nd Time Cotton. Not only is this stuff beautiful, it's also recycled from industrial waste. I'm a grown woman, but I'm not going to turn down an offer of free yarn from Mom!
And as further proof that the stars aligned for this project, I finished it while on vacation. In Cancun. Just in time to wear it and take the awesome beach photos seen here. I especially like the next photo which shows the neat design for the back of the top, in addition to my super awesome sunburn. Yay for being pale.
This was my first time working with cotton, and I would have to say that it turned out well. I still think that I prefer wool, but it was the right yarn for this project. It just means that I can't wear this top much longer, give the impending Wisconsin weather. Maybe it's time I get back to knitting socks...
Thursday, June 05, 2008
The White Period
In an effort to avoid working on the husband's sweater, I have come down with a severe case of start-itis. And it's not just little projects that allow me to get my knitting fix--we're talking lace.
Oh! I wish I could tell you it all ended with the lace, but there are the socks...
And of course I should mention the sweater...
Are you noticing the theme yet?
I really have no idea what strange white urge has come over me, but perhaps I am just tired of looking at that gosh darn blue sweater. Husband in starting to get antsy for his sweater, so I should probably finish off these projects soon and get back to the blue-sweater period.
(And in case you were wondering, they are the Lightweight Mountain Peeks Shawl, the Pembrokeshire Pathways socks, and the Short-Sleeved Cardigan with Ribbing from Fitted Knits)
Wednesday, April 02, 2008
On The Sunny Side Of My Feet
You know those projects that are completely annoying to knit, but you still love how they turn out? Well, this is a story about one of them.
My Snicket Socks started their life well over a year ago as a toe-up version, done is some handspun Merino yarn. While it sounds great in principle, I was—and still am—only a novice spinner. About halfway through the foot I realized that my spinning was too inconsistent and the yarn too soft to stand up to the abuse my socks usually take. While the yarn and the design at first appeared quite compatible, I knew that this relationship was never meant to be.
So the months passed and I let new projects into my life and even got married (to a man, not a sweater… well, that’s another story actually). But the Snicket pattern never left the back of my mind. So when my adviser’s wife (also a knitter) gave us a gift certificate to a LYS as a wedding gift, I knew right away that I wanted to make the Snickets. And I knew that they needed to be a happy, sunshine yellow. Luckily my LYS stocks Koigu.
The Koigu worked up much better than my handspun ever could, though I quickly realized that the pattern would be the most trying part of this project. The cables demanded a bit more attention than a normal sock design, so movies and card games no longer provided the opportunity for me to work on a pair of socks. And the cable needle kept sparing with the dpns when I did work on them. But like my mother always promised, the hard work would be worth it in the end. And it was.
I will never knit this pattern again, but I still love these socks. They are like sunny little honeycombs for my feet. So sweet!
Monday, March 17, 2008
Anemoi and Friends
I love to play hostess. Any excuse I can find to break out my good china, whip up a decadent dessert, or make a fragrant pot of tea, I will take. So what better way to fulfill all of these desires than to invite some friends over for an afternoon of knitting?
A number of women in my department are knitters, and the more years I spend doing research, the more of them I find. By now, I am no longer surprised that all my closest friends in Madison either knit or crochet. This is the second time I have hosted them for a knit-together, and each time I remember the joy of social knitting. Due to the success of this week’s event, I plan to host much more regularly!
And of course, what would a knitting blog be without some actual knitting content? Today’s specimen is my Anemoi Mittens, done in Knit Picks Pallette. This is another project that initially met with disaster due to my error in needle sizing. Knit Picks—will you ever label your Options DPNs?
Once I restarted on the correct size needles, however, this project went very well. Past a little awkwardness at the cuffs, I really fell into the rhythm of using two strands at once. I simply love the look of fair isle and I'm looking forward to tackling sweater-sized projects in the near future. But first, I need to finish a certain husband-sized project...
More on the husband's sweater in a future post!
Friday, February 01, 2008
Puff-Sleeved Cardigan
I am so happy to share my finished Puff-Sleeved Feminine Cardigan with you. Started in July of last year, this project was forgotten during all of the wedding activities of September. I picked it up again in January, vowing that I would not let it sit on the needles for more than 6 months. Too bad it will be too cold to wear it for another 3 months!
Puff-Sleeved Feminine Cardigan from Fitted Knits
knit with Knit Picks Merino Style in 'Mint'
I modified the pattern from the waist on down, adding one more set of decreases and extra rows at the waist. I did not like the original peplum design, so I worked it in stockinette with increases every 8 rows in two places on the front and every 4 rows in two places on the back. I also used 9 buttons to help eliminate any gapping along the front. All of these modifications improved the fit, as I am convinced that this pattern was written for a short-waisted individual.
In the end, I am very happy with this cardigan. All of the frogging and reworking really ensured a good fit, and the final blocking really helped. I foresee lots of future wear for this cardigan, especially since this green is one of my favorite colors.
Subscribe to:
Posts (Atom)