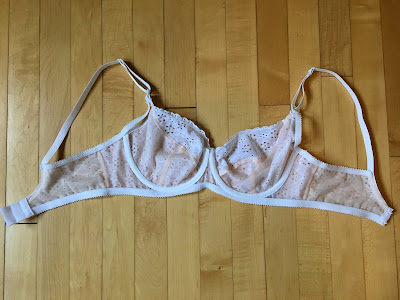
The main thing you need to sew a nursing bra is a pair of special maternity bra clasps (I got mine from Sew Sassy, where they are available in white, black, and beige). I matched up the width of the clasp to the width of my strapping, which works fairly well though is a little wide on top. The clasps replace the rings that usually connect the cups to the straps at the front of the bra (shown below).
 |
| Clasp in place of a ring connecting cup to strap |
There are three spots to connect the bra to the maternity clasp: 1) at the top of the clasp base, 2) at the bottom of the clasp base, and 3) on the piece that snaps onto the front of the clasp. The straps connect to #1 and the bra cup to #3 (allowing you to freely drop the cup for nursing), but you'll need to do something extra about #2. If you don't do anything with spot #2, the strap will fly away free when you unclasp to nurse and it will be a royal pain to get everything connected again.
 |
| Bra inside, showing both ends of the anchoring elastic |
The key is to connect spot #2 to the cradle, which won't interfere with nursing and will anchor the strap for when the cup is released. I do this using a short piece of edging elastic, connecting one end of the elastic to spot #2 on the clasp and the other end to the top edge of the cradle, just outside of the cup-cradle seam. It's very little extra sewing (a straight stitch to attach the elastic to the clasp piece and a zigzag to anchor the new elastic to the underarm elastic) and makes for a working nursing bra.
The one thing I don't like about this modification is that the new elastic often peeks out from under the side of the cup. But this is a small issue compared to having a working nursing bra.
One last thing to take into account is that you'll want to make your nursing bra in a larger size than you usually wear. I've been going up one cup size while leaving the band size the same, which fits me at the moment (but may be too small for when I'm producing a lot of milk). I don't have a perfect answer for what size to make, other than it at least needs to be larger in the cup than your usual size.
I've used this modification successfully on the following patterns: Cloth Habit Harriet (shown here), Cloth Habit Watson (demonstrated in this post), and Madalynne's Barrett Bralette (demonstrated in this post). I'm also happy to say that this Harriet bra was much more successful than my first Harriet, which had sizing issues. The first was a 34D and too tight around the band, so I went up to a 36C and then added a cup size for nursing, leading me to make 36D. The 36D fits great and the pattern was much smoother to assemble the second time around.
So there you go, some notes on how to modify a regular bra pattern to allow for nursing. I hope that they help other people experience the joy of sewing your own nursing bras!


