Tuesday, December 25, 2012

Happy Holidays

I hope you all are having a very happy holidays!

The morning after the huge snowstorm in Madison.

I'm lucky to staying with both my family and in-laws over my holiday break and I can't tell you how wonderful it is to be able to relax for a little while. I hope your holidays are just as relaxing and joyful and that all of your travels are safe!

Wednesday, December 19, 2012

The Final Countdown

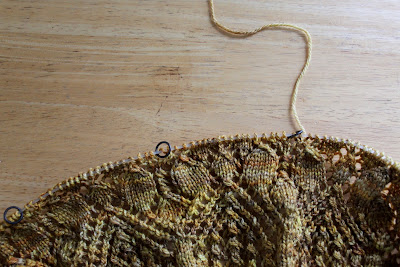
I'm two days away from being done with my craziest semester ever and, while I still have several things left to do, my mind is already sliding toward holiday break. For example, I should be studying for my databases final right now but all I really want to do is knit my Sherilyn shawl and read The Manhattan Projects (my latest geeky obsession).


I've actually had a bit of time to work on Sherilyn this week: I completed a whole 6 rows. Seeing as I'm in the middle of the third chart and there are now over 250 stitches per row, this is no mean feat. I'm right at the point where the rows are so long that I wonder why knitting a large lace shawl was a good idea. Thankfully, I'm so close to the end of the shawl that this phase will not last very long.


In other crafting news, all of my craft supplies were moved to Milwaukee last weekend in preparation for moving the rest of my stuff there this weekend. While moving is always a pain, I'm really looking forward to living under the same roof as my husband again. Just one more reason I can't wait for this semester to be over!

Tuesday, December 11, 2012

Seeing the Light

This past week went totally to hell in a handbasket. I knew it was going to be busy, but it got out of control very quickly. Honestly, if it weren't for husband doing some cleaning in my apartment, helping me wrap Christmas gifts that need shipping, and making sure I was fed during his visit to Madison this weekend, I would probably be in a corner crying right now. He's a real keeper and I'm so looking forward to us living in the same city and under the same roof again.


The good news is that I'm starting to see the light at the end of the tunnel and getting motivation to craft again. This is manifesting as an itch to make progress on my Sherilyn shawl.  I'm not sure how much knitting I'll be able to do on it in the next two weeks, but I plan to get some serious work done on the shawl over Christmas Break.


The best part is that I'll have lots of free time in January and I already have lots of ideas for things to make that month. Toward the top of the list is knitting a new pair Veyla mitts because I tragically lost one of my previous pair. I've also got lots of plans for sewing. I hope to do something with the fabric shown in this post (perhaps another Peony dress?) and I'm thinking about making a Weekender Travel Bag and possibly a Negroni for my wonderful husband. No matter what I decide on, I'm sure that January is going to be craftacular!

Tuesday, November 27, 2012

Bits and Bobs

I'm doing super secret things in the Briney Deep. The kind of things which lead me to take mysterious photos like this just to have an image of my crafting to share:


But don't worry, not only am I counting down the weeks until the end of this super-crazy-out-of-control semester (3 weeks plus finals), I will have a whole pile of things to show off post-Christmas. I honestly can't wait until January arrives; I have so many things I want to make once I have free time again.


In other news, I cut my hair and bought a new hat. I might have a bit of a hat problem, if my recent blog posts are any evidence. An intervention may be necessary before this becomes a blog all about hats.

Tuesday, November 20, 2012

Warming Up

I always dread blogging in November and December. There is so much crafting going on during these two months but it’s all secret-do-not-share-until-Christmas stuff. This year, it’s infinitely worse because I have so little free time that the only crafting that I’m currently doing is gift crafting. First world problems, I know.


I am, however, working on one project that I can talk about right now: knitting blanket squares for Warm Up America. One of the academic libraries on campus is organizing a square-drive and a bunch of us are getting together to knit/crochet blanket squares (photo above) each Friday from now until the end of the semester. It’s been a great way to spend a lunch hour and I feel good knowing that the squares I’ve made will keep someone warm this winter. So while you’re doing your holiday crafting, don’t forget to make something for those that could use a little extra warmth in their lives!

Tuesday, November 06, 2012

The Right Materials

Every crafter knows that having the right materials and tools makes a difference. Whether choosing fabric scissors over regular scissors or superwash wool yarn over regular wool yarn, there are times when it is really important to have the right material to do the job. Case in point is this hat.


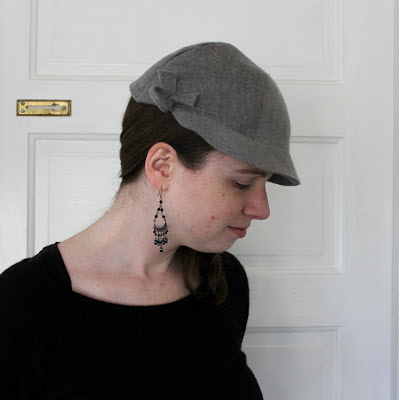
This hat is yet another design from the book Hat Shop (blogged here). It's very attractive, is built from only 5 pieces of felt, and is ridiculously easy to knock together--traditional seams are replaced with a zigzag stitch that holds two adjacent pieces of felt together at the edges. The one issue with this hat? The thickness of the felt is incredibly important.


The first time I made this hat, I used some blue felt I had on hand. The 2mm felt simply did not provide enough structure and the resultant hat was not attractive. So I ordered some 4-5mm felt and made a new version, which is the grey hat shown here. The thicker felt just makes this hat work.


So now I'm the proud owner of a pretty felt hat, not to mention a fair bit of 4-5mm felt. But seeing as these hats take about 30 minutes to cut out and sew together, I don't think you've seen the last of the handmade felt hats on this blog.

Tuesday, October 30, 2012

A Day Off

I am looking forward to the end of this semester. Come January, I won't be running around campus like a crazy woman and I will finally have some free time to devote to crafting and writing exciting posts for this blog. I had a taste of this magical free time on Sunday when a planned trip to New England was cancelled due to Hurricane Sandy. (To all of my readers who are in the path of Sandy: I hope you are staying safe!) Rather than doing more schoolwork, I decided to make use of this unexpected time to do a little knitting.


Luckily, I had a project all lined up to cast on during my travels. The pattern is the last in a long line of ideas for what to do with 800 yards of fingering weight Merino/Bamboo/Nylon yarn that I purchased on Etsy a few years ago. I can't tell you how many patterns I looked at or how many stitches I swatched before it finally hit me: there is a Ysolda shawl pattern, Sherilyn, that I have never knit and would be perfect for this yarn! I can't say no to a new Ysolda pattern.


So I cast on the shawl and knit about 60 rows on my day off while watching 'Elementary' (which is entertaining, but nowhere near as good as 'Sherlock' or Jeremy Brett's Sherlock Holmes series from the 80's). After recently surviving midterms week, it was so nice to not do anything serious for a whole day. Only two more months and I will back to a balanced schedule with more time for knitting. I can't wait.

Tuesday, October 23, 2012

Husband's Cap

My husband's birthday is today. It's one of those quiet birthdays with no big round number to celebrate, so we just did a few fun things over the weekend with his parents. Despite the quiet festivities, I've been looking forward to finally giving him his birthday gift. (I'm really terrible at keeping secrets from him so the suspense has been killing me.) I made him a newsboy cap!


The pattern is from the book Hat Shop, which I blogged about previously. The cap was a lot of fun to make and I particularly enjoyed working with visor board for the first time. I love making hats: they're quick to sew up, don't require many materials, and are great-looking accessories. And given the amount of visor board I now own, it's probably a good thing that I like making caps.


Husband likes his cap and I, personally, think the cap makes him look even more handsome that usual. So the next question is: how many caps do I have to sew before hats come back into style?

Tuesday, October 16, 2012

Secrets Secrets Are No Fun

It's difficult for me to blog about exciting crafty things right now. Classes are in full swing, so I don't have a lot of time for crafting, and the few things I am working on right now are secret can't-show-on-the-blog projects. It's not a great combination.


Thankfully, I'm getting close to finishing the yarn swap project for my friend O (above). I've tried 3 different patterns with this yarn and have finally found one that is working. It's been a frustrating experience, but has taught me some new things about working with cotton yarn. I promise details and photos once the project is finished and has been sent off to my friend!

Tuesday, October 09, 2012

Dirndl

I was at Oktoberfest in Milwaukee recently, which was a German festival centered around food, beer, and music. There is strong German heritage in Milwaukee so the festival was quite large with many adults and children enjoying the atmosphere. Beside doing some polka dancing, my favorite part of the whole experience was seeing all of the people in dirndls, lederhosen, and other traditionally German garb.


A few of the women in dirndls were part of a group (above) that demonstrated traditional German dances, but many of the women in dirndls were just there to enjoy the festival. Their dresses were all so beautiful and it was interesting to see how different the dirndls were for how similar they are in shape (the dirndl is defined by a wide skirt that is gathered at the waist and a fitted bodice worn over a white blouse). Needless to say, I came home from the festival with a serious case of dirndl envy.


I'm not going to be buying a dirndl anytime soon, but given my new-found sewing skills I can probably make one. A quick Google search turned up a few dirndl patterns and I eventually settled on the Folkwear 123 pattern. I'm hoping to make my dirndl before next year's Oktoberfest as I don't have a lot of free time at the moment.


The pattern itself looks great. In addition to pattern pieces and instructions, there are several sheets that explain the history of the dirndl, how the dress was worn, and traditional dirndl embellishments complete with instructions for making these trimmings. The dirndl is such a beautiful and historic dress and I'm really looking forward to making one for myself in the coming year!

Tuesday, October 02, 2012

New Book for Better Sewing

I talk about books a lot on this blog. Perhaps my need to share great resources with you is related to some of the reasons why I’m currently in library school, but really it’s that when I get excited about something I want to tell you why you should be excited about it too. My exciting-thing-to-share today is the lovely new book Gertie's New Book for Better Sewing, which is really inspiring me to improve my sewing skills and add more vintage style to my wardrobe.


This book was just released at the beginning of September, which perfectly coincided with my need to spend a little birthday money. The timing was quite great, especially considering how well the techniques covered in this book align with the things I still need to learn about sewing. In the little time I've had to read it thus far, I've learned a lot!


The book is a modern take on Vogue's New Book for Better Sewing. Gertie's book rehashes these vintage (and couture) techniques for making high-quality clothing without a fancy sewing machine. There is a lot of information on tailoring clothing, drafting patterns, making pattern alterations, and adjusting fit. A bunch of techniques are also covered in detail, from inserting a zipper and making a buttonhole to stabilizing a collar and lining a garment. I've been doing a lot of quick and easy sewing, and this book is just what I need to level up my sewing.


Beyond the wealth of technical information, what really appeals to me about this book are the patterns. The book contains 10 basic patterns (2 skirts, 2 blouses, 4 dresses, and 2 jackets), most of which have at least one variation shown and explained. The patterns are all vintage inspired but made for the modern sewist. I honestly want to make almost every pattern in this book, they are that stylish.


And speaking of stylish, the book itself is quite beautiful. Gertie is an excellent model for all of the clothing and the illustrations are simply gorgeous. I also appreciate that editors did not skimp on the photography in the techniques section. It's great to find a book that is super informative while also being very visually appealing.


I'm still only part way through reading this book in detail and I foresee many happy hours with this book in the near future. So thank you to my mother-in-law for enabling me to purchase this lovely resource!

Wednesday, September 26, 2012

One Man's Trash is Another's Treasure

Have you heard of the Little Free Library project? It's a project that started in Wisconsin but has sites across the country. The idea behind the project is that people put a little cabinet filled with books out near their sidewalk and their neighbors can borrow and exchange books. It is nothing formal, just book sharing based on good faith that you'll bring the book back or exchange it for another.


I passed by the Little Free Library near my apartment one recent evening and, on a whim, checked out the selection. Happily, I found this little gem of a macrame book, Macrame: Creative Design in Knotting. Needless to say, this book is staying with me and I left a different book in the library as a repayment.


Macrame is one of the fiber arts that is terribly out of fashion right now, having gone through a heyday in the 1970's. Still, I'm really intrigued by how you can use knots to make fabric. There must be a way to utilize macrame without making a project look kitschy or dated to the 70's. It's an interesting challenge.


Despite never wanting to make anything in the 1970's macrame style, I find the photos of such projects in this book endlessly amusing. What's not to love about a macrame poncho? Just don't ask me to wear it.


So I'm enjoying my 'new' book on macrame. The book contains a nice blend of techniques and delightful examples, so it's part tutorial and part 'inspiration'. I'm not sure I'll ever use any of this information, but I'm enjoying learning about the technique in the meantime. And maybe someday I'll find an interesting modern application for macrame.

Tuesday, September 18, 2012

Sencha

I wrote about being an obsessive crafter a few months ago and am proving that to still be the case with my latest obsession: Colette sewing patterns. I just finish my second Colette design, Sorbetto, and have now finished pattern number three, the Sencha blouse.


This project was a fun one because it was my first time working with silk. I learned that silk charmeuse is fussy to cut, reasonable to sew with, frays very easily, and doesn't like to be ironed. I would have loved to make my seams more crisp (especially the seam around the neckline), but didn't for fear of melting my fabric. I also learned that you need to use a small, very sharp needle when sewing with silk or else it will snag. Boy did I learn a lot.


I also brushed up on making buttonholes, which is something I vaguely remember doing once upon a time. (I used these two tutorials to refresh my memory on making buttonholes.) Unfortunately, I have no special buttonhole features on my sewing machine so I had to adjust all of the settings on the fly. The buttonholes came out well, though I had to rip out and fix parts of 3 out of the 5 of them. :-\


This blouse was a slow-and-steady project, though at times it was a comedy of errors. I definitely sewed one of the front ties into a seam, which took forever to rip out without damaging the fabric. I also wore this at work for a few hours before realizing that I never finished the bottom hem. Hopefully, now that it's done I can just enjoy wearing it without worrying something else crazy will happen to it!

Tuesday, September 11, 2012

Terraria

I married a wonderful man. He gave me the most perfect birthday gift this year: plants and dirt. It's not a glamorous gift, but it is just what I needed to finally build the terrarium I've been dreaming about for almost a year. My beautiful glass house from IKEA has been waiting empty for far too long.


I used this guide on building a terrarium as the basis for assembly. Most of the ingredients are straightforward and easy to source--rocks, moss, dirt, and succulents--but husband made a special trip to the pet store for activated charcoal, which keeps the water clean. I love how beautiful all of the components look layered in a glass vessel.


Husband actually bought me enough supplies to make two terraria and I was lucky that my gallon-sized jar was no longer needed in the kitchen. Now I have two lovely terraria to add some happiness to my apartment! They are so beautiful already, but I might add a few figurines as finishing touches; I can't help thinking that a couple tiny dinosaurs would be right at home among the succulents.

Tuesday, September 04, 2012

Sherbet Lemon

I finally finished the Ysolda wristies I've been working on for months. The pattern is Sherbet Lemon worked in the luscious Blue Sky Alpacas Alpaca Silk. I honestly can't wait for it to be cold so that I can wear these mitts and my new cowl. I have so much soft knitwear to keep me warm this fall!


I'm in love the cable on this pattern. The beauty of the cable actually makes me overlook the few issues I have with the fit of the mitts. Perhaps my gauge is off, but the gloves are a little loose throughout and I find them rather short--they hardly cover my knuckles, which I find slightly annoying. Despite these deficiencies, their beauty and wear-with-all cream color means that they'll probably get a lot of wear once it finally turns cold.


This might be my last knitting project for a while, as the fall semester starts this week. It's my final big semester and a bit of a push for me. I hope to get a little crafting in edge-wise, but apologize ahead of time if my posts aren't as regular as usual over the next few months. Thanks for understanding.

Tuesday, August 28, 2012

Free Pattern: Luxus Cowl

I have been in love with the yarn Misti Alpaca Chunky from the moment I first laid fingers on it. Its extreme softness and its big bulky nature were such strong attractors that my only method of self defense was remembering my grad-student budget. After ogling the yarn for the hundredth time on a recent trip to the local yarn shop, I finally afforded myself the luxury of a single skein with the intention that it would be made into something special. The result is this cowl.


The cowl was designed with two things in mind: to showcase the beauty of the yarn and to produce a big squishy cowl that uses as much of the skein as possible. With less than 2 yards of leftover yarn, I'm pretty sure I succeeded in at least one of these goals. This project is a simple, quick, and luxurious knit, and I'm looking forward to wearing this soft fabric against my skin once it gets cold. With autumn just around the corner, perhaps you should knit one too!


To make this cowl, you'll need:
- 1 skein of Misti Alpaca Chunky (108 yards, bulky weight); colorway 1110 shown here.
- A set of US 10 / 6 mm circulars or double points

The finished cowl measures 21 inches around with a gauge of 13 st/25 rows = 4 inches in seed stitch.


PATTERN:
Cast on 72 stitches. Join to work in the round, being careful not to twist.

Border:
Round 1: [K1, P1] to end.
Repeat this round 4 more times.

Next round: [K1, P1] to 2 st from end, K2tog. (71 st)

Main Section:
Round 1: [P1, K1] to 1 st from end, P1.
Round 2: [K1, P1] to 1 st from end, K1.
Repeat rounds one and two 16 more times.

Round 35: [P1, K1] to 1 st from end, P1, M1.  (72 st)

Border:
Round 1: [K1, P1] to end.
Repeat this round 4 more times.
Cast off. Weave in ends.

Questions or errata? Contact me at brineydeepdesigns_at_gmail_dot_com!

Tuesday, August 21, 2012

Sorbetto

The fun part about picking up a hobby is that every new project can teach you a different skill in that hobby; this has been especially true with my sewing. I learned a lot from making my first bag and making a semi-complex dress, but there are still whole areas of sewing that I have yet to touch. So I am out to improve my sewing skills slowly and steadily by picking up a new technique with each subsequent project.


My most recent project, a Sorbetto top, demonstrates that even a simple project can teach you a lot. One of the things I learned was how to work with a sheer and drapey fabric. For example, I needed to be much more careful when cutting and sewing, as the fabric didn't always lay nicely and required adjustments with the sewing machine's tension. I did pretty well for my first time out, but I realize that I still have work to do in this area.


The other thing I learned from this project was how to make a french seam (shown above). French seams are enclosed seams than help prevent fraying and make your seams look very tidy. I did french seams for this project because I did not want raw edges showing through the sheer fabric. Plus, there weren't that many seams to sew, which made the process of sewing french seams (which are effectively two seams in one) a manageable prospect. I think that the extra effort I put into the seams really paid off for making the top look finished.


This is my second Colette sewing pattern (my first was Peony) and I must say that I'm impressed with the simplicity and elegance of her designs, made better through clear and detailed sewing instructions. I should note that this pattern, Sorbetto, is a freebie, so it's an easy place to start if you're interested in learning more about this designer. Honestly, I enjoyed sewing both Colette projects so much that I can't wait to start my next one: a Sencha blouse.

Tuesday, August 14, 2012

All Wrapped Up

Let's not talk about the huge amount of television I've watched in the past two weeks. It's a lot. I'm not a TV watcher normally, but I make an exception for the Olympics. I can't get enough of the inspiring stories and obscure sports. Plus, it makes for great crafting time.


Wire wrapping turned out to be one of the better TV-watching crafts, and I made several pairs of earrings (my favorite are the simple turquoise drops below) and a large necklace (above) while watching the Games. As you can see from this tutorial, the basic loop--which was the foundation of all of my wrapping projects--is actually quite simple. Once you get the hang of this loop, it's no problem to whip up lots of complex-looking jewelry while watching sports.


My crafty output will certainly go down now that the Olympics are over and I'm gearing up for my last big semester of school. Still, wire wrapping is easy enough that I look forward to picking it up again in a free moment this fall. I'll keep you posted on any future wire wrapping exploits.

Tuesday, August 07, 2012

Two Ways to Fix a Pattern

Last time we spoke about my sunhat, things were not going all that well. The hat was too small for my (albeit somewhat large) head and the brim was too deep to be usable. Things obviously needed fixing and I'm happy to report that I figured out two ways to do so.


The first solution involved styling the finished hat. My friend P was over for Olympics watching/craft time and had the genius idea to fold the brim twice instead of once. The result not only worked but was super cute. Since the folds would only stay in place if pinned, I whipped up a tsumami kanzashi pin to complete the transformation.


Beyond styling, the other solution was simply to fix the pattern itself. I took 1.5 inches off the bottom of the brim, which was a compromise between still having a broad brim and being able to see below the brim. I also took 0.5 inches off the top of the brim, which added an inch to the hat size and, more importantly, fixed an error in the pattern by making the inner brim size match the cap circumference. The resulting pattern was much easier to sew and the finished hat fits me very well.


Sewing a mock-up, making pattern alterations, then sewing the final project is a standard habit in sewing; it is referred to as 'making a muslin', after the inexpensive material used for this pattern testing. In my case, I made a 'working muslin' because the first hat was intended to be wearable. Making muslins takes time but is something I definitely need to start doing as I work with more expensive fabrics. I'm just glad that in this case my working muslin turned out to be usable after all!

Tuesday, July 31, 2012

Yarn Swap, Round Two

My friend O and I enjoyed our yarn swap so much that we're doing it again! This round, I sent her some of my handspun and she sent me a custom blend yarn from Yarnia in Portland.


The yarn is made up of a number of cotton strands that have been wound together on the cone. It's not like a normal yarn, as there isn't any twist holding these strands together, but it should knit up pretty well. I especially like the colors my friend chose for this yarn; it has some color depth that's hard to capture in this photo. Now that I have the yarn in hand, it's on to planning what to make for my friend!

2012-07-03 Edited to Add:
And here is my friend O's post about the yarn swap, complete with better photos of both yarns.

Wednesday, July 25, 2012

Joins

It's been a fun week for getting together with knitters, starting in Chicago where I was at a conference for 4 days. My roommate for the trip and fellow conference attendee, Abby, was someone I'd met through Ravelry and messaged several times but never actually met in person. I know this sounds like a recipe for disaster, but it ended up being wonderful and by the end of the trip we were finishing each other's sentences.

The Chicago crew. Image courtesy of Abby, the knitter on the far left. Thanks Abby!

While in Chicago, Abby and I also got together with some members of the Harry Potter Knit/Crochet House Cup group from Ravelry. We started a Loopy Yarns (where I convinced Abby to knit her first Ysolda pattern, an Ishbel) and ended up eating Thai food and knitting together. It was wonderful to see everyone and catch up.

The Madison gathering. Image courtesy of Judith.

Once back in Madison, I met up with more knitters from the House Cup. (What can I say? We like get-togethers.) It's amazing how easy it to transition from hanging out with all of these people virtually to spending time together in person. I always enjoy it.

Russian Join in Progress

While at the Madison gathering, someone taught me how to Russian Join (a technique that joins two yarn ends together). How did I not know how to do this before?! You simply weave the yarn ends back into the working yarn, which creates a pair of loops that can be used to connect the two strands. In my opinion, Russian Joining is right up there with spit-splicing in miraculous-knitting-techniques-everyone-should-know and techniques-that-save-you-from-weaving-in-ends. I anticipate using Russian Joins extensively in my future knitting.