Showing posts with label Free Pattern. Show all posts

Tuesday, January 07, 2014

Free Pattern: Lake Effect Muff

Living in Wisconsin, you get pretty used to not seeing the grass from November through May. It was that way when I lived in Madison and it's even worse now that I'm in Milwaukee because of lake-effect snow. The past 2 months have taught me to add 3 inches of snow to the forecast just because I live close to Lake Michigan. Still, I don't mind the snow so long as I have ways to stay warm.

(I should add that, as I wrote this, an ad for ice fishing supplies came on TV. Welcome to life in the north!)


Living around so much snow means that I'm always on the lookout for things that are both warm and stylish, and nothing says winter glamour quite like a muff. I made this one out of bulky and super bulky yarns, so it knit up quickly and provides a lot of warmth. It's going to keep my fingers super toasty this winter when worn over my gloves (because, seriously, it's too cold to go outside with only one layer on the hands).


The muff itself is dead simple to make--it's simply two stockinette tubes, one inside the other, with optional fiberfill stuffing. The trickiest part is actually grafting the last row of stitches to the cast on edge, though you could always seam everything if you don't like grafting. Either way, I hope you enjoy the pattern and are finding lots of pretty and cozy ways to stay warm this winter.


Yarn:
Requires ~70 yards each of super bulky (MC) and bulky (CC) yarns.

I used:
MC: 1 skein Istex (nee Reynolds) Bulky Lopi in Gray [100% Wool, 67 yds per 100 g skein]
CC: 0.2 skein Cascade Eco Wool in Natural [100% Wool, 478 yds per 250 g skein]

Another good option is Lion Brand Wool Ease Thick & Quick (MC) paired with Wool Ease Chunky (CC).

Materials:
Size 10 dpns (or 16" size 10 circulars)
Size 8 dpns

Fiberfill (optional)

Darning needle for grafting

Gauge:
MC and size 10 needles: 14 st/20 row = 4 inches in stockinette
CC and size 8 needles: 18 st/25 row = 4 inches in stockinette

(The gauge is a little tighter than normal so as to keep fiberfill in and wind out)


Pattern:
Provisionally cast on 48 stitches in MC on size 10 needle.
Join to work in the round, being careful not to twist your stitches.

Knit 9 inches in stockinette.

Switch to CC and size 8 needles.

Continue to work in the round in CC for another 8.5 inches.

Cut yarn, leaving long tail. Weave in all ends but this one.

Fold CC lining down into center of MC cylinder, with wrong sides of the fabric together. Stuff lightly with fiberfill between the layers, if desired.

Remove provisional cast on and graft CC stitches to MC stitches using long CC tail. Weave in end.

Wear and stay warm!

Tuesday, August 28, 2012

Free Pattern: Luxus Cowl

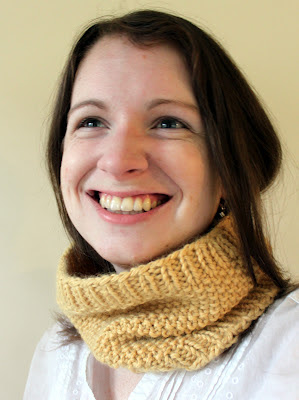
I have been in love with the yarn Misti Alpaca Chunky from the moment I first laid fingers on it. Its extreme softness and its big bulky nature were such strong attractors that my only method of self defense was remembering my grad-student budget. After ogling the yarn for the hundredth time on a recent trip to the local yarn shop, I finally afforded myself the luxury of a single skein with the intention that it would be made into something special. The result is this cowl.


The cowl was designed with two things in mind: to showcase the beauty of the yarn and to produce a big squishy cowl that uses as much of the skein as possible. With less than 2 yards of leftover yarn, I'm pretty sure I succeeded in at least one of these goals. This project is a simple, quick, and luxurious knit, and I'm looking forward to wearing this soft fabric against my skin once it gets cold. With autumn just around the corner, perhaps you should knit one too!


To make this cowl, you'll need:
- 1 skein of Misti Alpaca Chunky (108 yards, bulky weight); colorway 1110 shown here.
- A set of US 10 / 6 mm circulars or double points

The finished cowl measures 21 inches around with a gauge of 13 st/25 rows = 4 inches in seed stitch.


PATTERN:
Cast on 72 stitches. Join to work in the round, being careful not to twist.

Border:
Round 1: [K1, P1] to end.
Repeat this round 4 more times.

Next round: [K1, P1] to 2 st from end, K2tog. (71 st)

Main Section:
Round 1: [P1, K1] to 1 st from end, P1.
Round 2: [K1, P1] to 1 st from end, K1.
Repeat rounds one and two 16 more times.

Round 35: [P1, K1] to 1 st from end, P1, M1.  (72 st)

Border:
Round 1: [K1, P1] to end.
Repeat this round 4 more times.
Cast off. Weave in ends.

Questions or errata? Contact me at brineydeepdesigns_at_gmail_dot_com!

Tuesday, December 07, 2010

Yogurt 101

I'm doing a little experiment today, not only in the form of this blog post as a pattern plus recipe but also an experiment in microbiology--culturing milk to make yogurt.

It's worth making your own yogurt for two reasons: (1) it is fairly easy and inexpensive to make yogurt at home and (2) yogurt has a number of health benefits. Milk becomes yogurt by encouraging friendly microbes to multiply and breakdown lactose and other molecules in milk. To do this, you simply combine a small amount of yogurt (from the previous batch or from store-bought yogurt) with milk and heat everything up to encourage the microbes to grow.


So how does this all relate to knitting? Well, the yogurt/milk mixture needs to be kept warm for several hours during the culturing process. Wrapping a towel around the culturing container is one way to keep the liquid warm, but as a knitter I find the idea of using a jar cozy to be much more appealing. Both in terms of the cozy-factor and the cute-factor.


My Yogurt 101 lesson goes through both how to make yogurt in a standard one-quart canning jar as well as how to knit a cozy for that jar to help with the culturing process. Do try this at home!

Making the Yogurt
Using directions from The Curious Cook


Ingredients:
1 quart whole milk
2 Tbsp store-bought or homemade yogurt


Recipe:
Slowly warm milk to just below boiling (180-190 F), being careful not to scorch it. Allow the milk to cool to 115-120 F. Whisk in yogurt and pour mixture into warm one-quart canning jar. Cover jar with cozy and let sit undisturbed for about 4 hours or until the yogurt sets up. If you want your yogurt to be thicker, strain it through a cheesecloth. Store yogurt in the fridge.

Making the Jar Cozy


Requirements:
- 75 yards Cascade Eco Wool (or another bulky wool yarn)
- Set of five US size 10 [6 mm] dpns

Gauge:
15.5 stitches and 22 rows = 4 inches in stockinette

Pattern:
Cast-on 48 stitches. Divide stitches evenly over 4 needles (12 stitches per needle).
Join to work in the round, bring careful not to twist.

Work in [K1, P1] rib for 2 inches.

Work in stockinette (all knit) for 5 inches.

Decrease for bottom as follows;
Work [K to last 2 stitches on needle, K2tog] a total of 4 times.
Repeat this row 9 more times until 8 stitches remain.

Break yarn and pull end through remaining stitches.
Weave in ends, put jar into cozy and make yogurt!

Monday, June 28, 2010

Free Pattern: Fairy Lights

I love sudden flashes of inspiration. The type that makes you put down everything else and create this genius thing you've just dreamed up. This hat is one of those ideas. I'm not sure exactly where it came from, but last week a slouchy pixie hat seemed like the best idea in the world. Kind of wacky, yes, but also really cute. And since it wasn't too difficult to make, I'm sharing the pattern notes with you!


I'm calling it the Fairy Lights hat, but secretly I refer to it as 'slouchy in front, pixie in back'.


To make one, you'll need:
- 1 skein of Cascade 220 (220 yards, worsted weight)
- A set of US 7 / 4.5 mm double points
- 3 stitch markers

The finished hat measures 22 inches around with a gauge of 22 st/28 rows = 4 inches in stockinette.


PATTERN:
CO 96 st. Join to knit in the round, being careful not to twist.

Mark the beginning of the round with a stitch marker

Hat Band:
Work in (K1, P1) for 1 inch.

Main Section:
Work (K2, M1) 18 times, then knit to end of round. 114 stitches total.

Knit even for 4 inches, or until the hat measures 5 inches from the brim.

(Knit 38, place marker) twice, knit to end of round.

Crown Decreases:
Row 1: (SSK, K to 2 st before next marker, K2tog) three times.
Row 2: Knit.

Repeat these two rows until there are 6 st left, ending with row 1.

K2tog until 1 stitch remains. Cut yarn and pull through the loop.

Weave in ends and pretend to be a pixie (or even a gnome)!

Monday, April 05, 2010

Context Scarf

My latest free pattern is now available!

The Context Scarf is a study on texture, countering the delicate nature of lace with chunky garter stitch, which plays against a smooth feminine ruffle (optional). All of these elements add up to something that you’ll want to wrap around your neck to keep you warm!


The pattern is written in two sizes, but can easily be adjusted by adding more chart repeats or working the pattern in a different weight of yarn. As written for fingering weight yarn, the large (shown in grey) is just big enough to wrap around your neck twice and knot in front—a very stylish way to keep the chill out.


Pattern Requirements:
200-400 yards of fingering weight yarn
(This is a great pattern to try out some handdyed sock yarn from Etsy)
Size US #5/3.75 mm needles

Finished Measurements:
Height: 9 [11.5] inches (plus 1.5 inches with optional ruffle)
Width: 32.5 [41] inches (plus 3 inches with optional ruffle)

Gauge:
22 st x 20 rows = 4 inches in garter stitch

Difficulty:
This pattern is for an intermediate knitter who is comfortable working with charts.


You can download the pattern as a free pdf on Ravelry, as well as find more information there. Or you can download it directly using this link.

Happy knitting!

Tuesday, October 20, 2009

Free Pattern: bHive

I've got a sweet little pattern for you all today! Made with leftover sock yarn, this phone cozy is a quick and cute knit. The honeycomb pattern is achieved through slipped stitches, which makes it much simpler to knit than traditional fair isle. I made mine to fit my new iPhone, but the pattern can easily be adjusted to fit a different phone, a camera, or even a gift card. I had a lot of fun knitting this up and I hope you do too!


bHIVE

Finished Measurements: 2.75 inches wide x 4.75 inches tall.

Gauge: 32 st/44 rows = 4 inches in stockinette.

Needles: Set of 4 US#2/2.75mm dpns or comparable circular needle for magic loop.

Materials:
Main Color (MC): ~35 yards of fingering weight yarn.
[I used Knit Picks Essential (Stroll) Tweed in Russet.]

Contrast Color (CC): ~25 yards of fingering weight yarn.
[I used Koigu Painter's Palette Premium Merino in the P616 colorway.]


Pattern:
Cast on 48 st in MC. Join to work in the round, being careful not to twist.

Work in *K1, P1* rib for an inch.

Round 1: Knit.
Round 2: Purl.

Join CC.
Round 3: With CC, *K6, sl2 wyib* 6 times.
Repeat this row 3 more times.

Switch to MC.
Round 7: Knit.
Round 8: Purl.

Switch to CC.
Round 9: *K2, sl2 wyib, k4* 6 times.
Repeat this row 3 more times.

Switch to MC.
Round 13: Knit.
Round 14: Purl.

Repeat rows 3-14 3 more times.

With MC, work in stockinette for an inch.
Divide stitches evenly over 2 needles. Kitchner stitch bottom of cozy closed.

Weave in ends and enjoy!


Questions or errata?
Contact me at brineydeepdesigns_at_gmail_dot_com!

Tuesday, October 28, 2008

Free Pattern: Bike Helmet Earmuffs

People bike year-round in Madison, Wisconsin. And while I refuse to bike in any sort of snow, it is very likely that I will meet with cold weather as I bike to work in October and November. My husband was the first to state that his ears were getting cold while biking, giving me the look that clearly said, “I’m sure that you can fix this by knitting me something.” So I set to work making him a liner for his bike helmet; something that would cover his ears, integrate into the straps, and, most importantly, stay in place. After a couple hours of knitting, I’m delighted to share the result with you!


And if you are interested in knitting your own ear-warmer, I've written up some pithy instructions below:

BIKE HELMET EARMUFFS

Gauge: 20 st/28 rows = 4 inches in stockinette
Needles: Set of 5 US#7/4.5mm dpns
Materials: 1 ball Knitpicks Swish Worsted [Superwash Merino Wool, 110 yds per 50 grm ball] in Dark Navy


Pattern:

Cast on 12 st. Join to work in the round, being careful not to twist.

*K1, P1* for a total of 4 rounds.

Divide stitches evenly onto 4 needles.

Round 1:
*K1, M1, K to end of needle. K to last stitch on second needle, M1, K1.* Repeat ** for needles 3 and 4.
Round 2 & 3: K even.

Repeat these three rounds seven more times until you have 44 stitches, ending with round 3.

Work 4 rounds in *K1, P1* ribbing.

Cast off 22 st.

Continue to work *K1, P1* rib back and forth with the other half of stitches for 10.5 inches, or whatever fits your helmet/head.

Cast on 22 st on the same side of your knitting as you cast of the previous stitches. Divide stitches evenly over 4 needles. Join to work in the round, being careful not to twist.

Work 4 rounds in *K1,P1* ribbing.

Round 5 & 6:
K even.
Round 7: *SSK, K to end of needle. K to second to last stitch on second needle, K2tog.* Repeat ** for needles 3 and 4.

Repeat these three rounds seven more times until there are 12 stitches.

*K1, P1* for 4 rounds.

Cast off. Weave in ends.


Questions or errata? Contact me at brineydeepdesigns_at_gmail_dot_com!

Creative Commons License
This work is licensed under a Creative Commons Attribution-ShareAlike 3.0 Unported License.

Monday, October 13, 2008

Free Pattern: Walking Stripes

This pattern is also available as a free pdf download on Ravelry


These may appear to be simple striped mitts, but they have a secret. Turn them round and round and you will never find a seam or a jog. Instead, the stripes ‘walk’ continuously from the wrist to the knuckles, all the way up the mitt.

The key to achieving this effect is to layer the colors a little bit at a time. Each color is worked for only 75% of the total stitches, with the next color worked directly overtop it. Retaining a few live stitches in each of the four colors prevents the stripe pattern from being interrupted.

Besides learning a new technique, these mitts offer a great opportunity to play with color. Choose three yarns of a similar hue and add a contrast, as for the mitts shown here, or use the same color twice to produce two stripes on a neutral background. Alternatively, create subtle fraternal mitts by changing the order of the stripes.

So grab a few spare skeins of yarn and make a pair for yourself or a friend. You’ll find that these stripes work up quickly (despite the fact that they don’t jog)!


Finished Measurements
Width: 4 inches
Length: 8 inches

Gauge
24 sts/34 rows = 4" in stockinette stitch

Materials
Knit Picks Telemark [100% wool; 103 yd/94 m per 50g ball]; 1 ball each
[MC] Pesto
[CC1] Northern Green
[CC2] Aubergine
[CC3] Lichen

Set of 5 US #3/3.25 mm double-point needles

Stitch markers

Scrap yarn

Tapestry needle

Difficulty
This pattern is suitable for an advanced beginner who is comfortable working with double-points.

Pattern Notes
The needles in this pattern are numbered in a clockwise direction, with the very first stitch being on needle 1. Though rounds may begin on different needles, the numbering will remain fixed relative to the very first stitch.


PATTERN
CO 48 st in MC. Divide evenly over 4 needles. Join, being careful not to twist.

Bottom Cuff
*K1, P1* for a total of 10 rounds.

Set up striped section
With MC, k12 on needle 1.
Join CC3, k12 on needle 2.
Join CC2, k12 on needle 3.
Join CC1, k12 on needle 4.

At this point, there will be 12 stitches in each color on the four needles.

Turn work and pick up CC2. K9 on needle 4, sl3.
Turn work and pick up CC3. K18 on needles 3 and 4, sl6.
Turn work and pick up MC. K27 on needles 2, 3, and 4, sl9.

You should now have 3 stitches in each color on needle 4; the other needles are all MC. Note that you will return to this ‘home’ configuration after ever 4 rows but ending on a different needle, as you will only work 3/4 of the total stitches for every 4 written rows.

Main section
Row 1: with CC1, K36, sl9.
Row 2: with CC2, K36, sl9.
Row 3: with CC3, K36, sl9.
Row 4: with MC, K36, sl9.

Repeat rows 1-4 six more times, ending with 3 stitches in each color on needle 1.

Row 29: with CC1, k35, place marker, m1, k1, sl1, place marker, sl8.
Row 30: with CC2, k37, sl9.
Row 31: with CC3, k37, sl9.
Row 32: with MC, k37, sl9.

Row 33: with CC1, k1, m1, sl marker, k35, sl10.
Row 34: with CC2, k37, sl10.
Row 35: with CC3, k4, sl marker, m1, k4, m1, sl marker, k29, sl10.
Row 36: with MC, k39, sl 9.

Row 37: with CC1, k11, sl marker, m1, k6, m1, sl marker, k23, sl9.
Row 38: with CC2, k42, sl9.
Row 39: with CC3, k17, sl marker, m1, k8, m1, sl marker, k17, sl9.
Row 40: with MC, k44, sl9.

Row 41: with CC1, k23, sl marker, m1, k10, m1, sl marker, k11, sl9.
Row 42: with CC2, k46, sl9.
Row 43: with CC3, k29, sl marker, m1, k12, m1, sl marker, k5, sl9.
Row 44: with MC, k48, sl9.

Row 45: with CC1, k35, sl marker, m1, k7, sl15.
Row 46: with CC2, k43, sl15.
Row 47: with CC3, k41, sl marker, m1, k2, sl15.
Row 48: with MC, k44, sl9.

Row 49: with CC1, k7, m1, sl marker, k35, sl17.
Row 50: with CC2, k43, sl17.
Row 51: with CC3, k14, m1, sl marker, k29, sl17.
Row 52: with MC, k44, sl9.

There are now 18 stitches in between the markers. Place the center 16 st on a piece of scrap yarn and remove the markers. These reserved stitches will make the thumb (below). The remaining 48 stitches should be back in the ‘home’ configuration, with 3 stitches in each color on needle 3.

Repeat rows 1-4 three more times, ending with 3 stitches in each color on needle 4.

End striped section
With CC1, k36, sl9.
With CC2, k27, ending on needle 2.
On needle 4 with CC3, sl6, k18 on needles 4 and 1.
On needle 4 with MC, sl3, k9 on needle 4.

There will be 12 stitches in each color on the four needles, as in the beginning.

Cut CC1, CC2, and CC3.

In MC, knit one round.

Top Cuff
*K1, P1* for total of 7 rounds.

Bind off loosely.

Thumb
Pick up 16 stitches on scrap yarn, dividing over 3 needles.
With MC, pick up and knit 2 stitches at the back of the thumb hole.

*K1, P1* for a total of 6 rounds.

Bind off loosely.

Finishing
Pull contrast color ends snug. Weave in all ends.

This pattern is intended for personal use only.
Questions or errata? Contact me at brineydeepdesigns_at_gmail_dot_com!

Tuesday, December 18, 2007

Free Pattern: Case In Point

I love to knit with double points, which means that I have a number of sets in a range of sizes. With such a large collection, it soon became apparent that I needed a practical way of storing and organizing all of them. Being a thrifty knitter, I set out to knit my own double point case and this pattern is the result of that effort.

Case In Point is a knitted version of a rolled double point case, with seven pockets in varying sizes. It can comfortably store 10 sets of dpns; I usually have a few sets of socks needles and other dpns up to size 11 in mine. While this version is knitted out of Schoeller + Stahl Ole, any sport weight yarn in a sturdy wool or cotton will suffice.


Gauge: 24 stitches = 4”, 36 rows = 4” in stockinette
Yarn: Schoeller + Stahl Ole (sport weight cotton-wool blend, 50 g/ball)
2 balls pink (MC), 1 ball off-white (CC)
Needles: US #5, straights and double points

ABBREVIATIONS
LK2tog: Lift corresponding stitch from “case body”, place on left needle. Knit together with 1 “pocket” stitch.
LEK2tog: Lift stitch from “case body” inner panel edge (next to seed stitch border), place on left needle. Knit together with 1 “pocket” stitch.

CASE BODY
In main color, CO 73 st. Work 5 rows in seed stitch. (You can run a lifeline through the stitches at this point, which will aid in picking up the pocket stitches later).
Main pattern:
Row 1: K1, P1, K1, P1, K across to last 4 stitches, K1, P1, K1, P1
Row 2 and all even rows: P1, K1, P1, K1, P across to last 4 stitches, P1, K1, P1, K1
Row 3: K1, P1, K1, P1, K1, [K3, P1] to last 8 stitches, K5, P1, K1, P1
Row 5: Repeat row 1
Row 7: K1, P1, K1, P1, K2, [P1, K3] to last 7 stitches, P1, K3, P1, K1, P1
Work these 8 rows for a total of 8 repeats of the overall pattern.
Work 5 rows in seed stitch. Bind off, weave in ends.

POCKETS
Pick up 65 st on WS on bottom edge of case body, just above seed stitch border and between side seed stitch borders. Each pocket stitch will correspond to one case body stitch (excluding seed stitch border). With contrast color, work pockets:
Row 1: LEK2tog, K12, LK2tog, K11, LK2tog, K9, LK2tog, K9, LK2tog, K7, LK2tog, K5, LK2tog, K4, LEK2tog
Row 2: Purl
Repeat these 2 rows 21 times.
Row 43: LEK2tog, [K1, P1] 6 times, LK2tog, P1, [K1, P1] 5 times, LK2tog, P1, [K1, P1] 4 times, LK2tog, P1, [K1, P1] 4 times, LK2tog, P1, [K1, P1] 3 times, LK2tog, P1, [K1, P1] 2 times, LK2tog, [P1, K1] 2 times, LEK2tog
Row 44: P1, [K1, P1] to end
Repeat these 2 rows once.
Bind off, weave in ends.

TIE
With contrast color, work 30 inches of 3 stitch I-cord. Sew middle of I-cord to large pocket end of case body, halfway up the seed stitch border.


Questions or errata? Contact me at brineydeepdesigns_at_gmail_dot_com!